Pan Adapter for TS-590SG
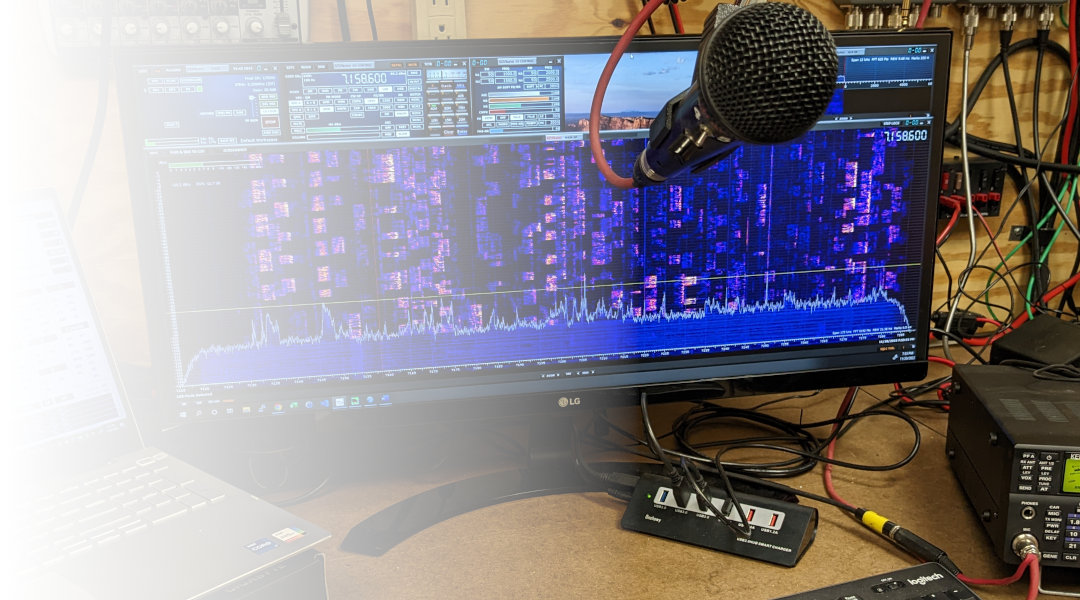
As transceivers entered the SDR age, I felt a little left behind for my aging Kenwood TS-590SG. The SDRPlay RSP1a came on the market, and I found that they paired nicely with the Kenwood to provide a pan-adapter graphical display. A pan-adapter visualization for a ham radio shows the RF spectrum in real-time, featuring a spectrum display and a waterfall display. The spectrum display highlights signal strength across different frequencies, while the waterfall display uses color gradients to show signal strength over time. This combination helps operators identify active frequencies and monitor signal changes.
Keep reading to learn how to add a pan-adapter to the Kenwood TS-590SG HF radio.
Hooking up the SDR Play
There are other ways to accomplish the integration, but the Kenwood TS-590SG includes a feature built into the radio that allows a secondary external sub-receiver to be tied into the same antenna feed that the TS-590SG uses. When tied together in this way, the external pan adapter receives the exact same signal that the '590 is hearing, while being simultaneously protected from an accidental keying of high RF power.
Begin configuring the TS-590SG by entering the menu options by pressing the MENU button on the front panel, then using the left/right arrows to navigate to option 85. Press the Up/Down arrows to set this menu item to "Ant" for antenna. Exit the menu by pressing MENU again.
Enable the DRV output by holding down the METER button for about a second. The radio will beep, and when the feature is enabled, there will be an * on the front panel near the right side. Hold the METER down a second time if needed to turn the feature back on.
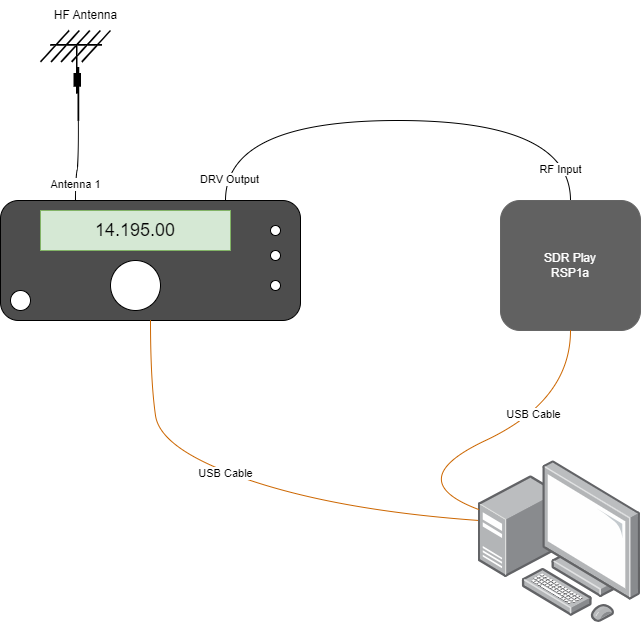
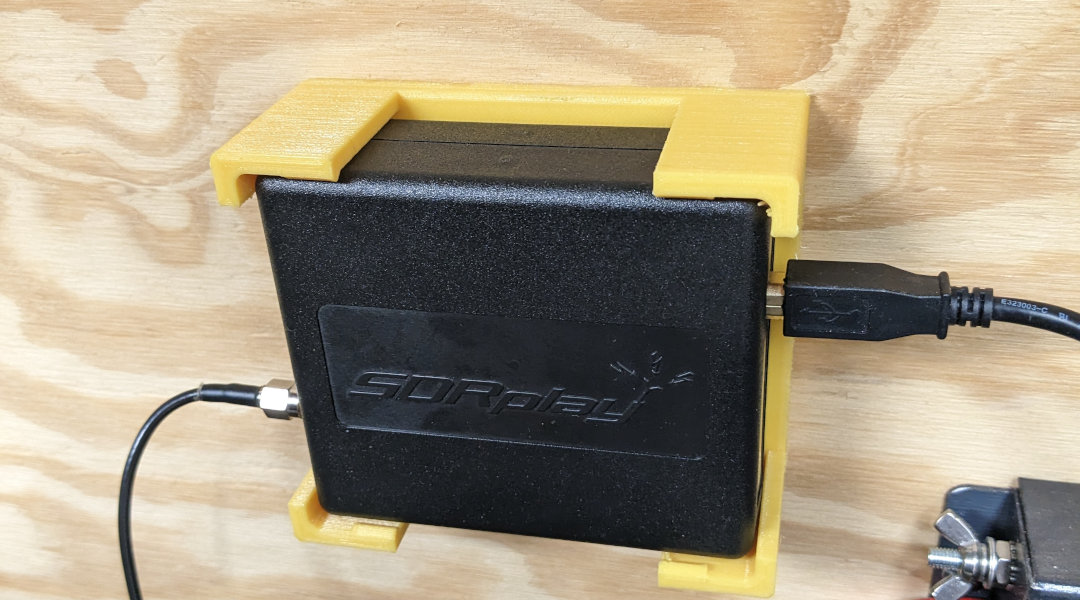
The SDRPlay receiver should be cabled up to the TS-590SG from the DRV port on the back of the radio. You will need a coax cable with the appropriate adapter to connect from an RCA connector to SMA.
Follow the instructions from SDRPlay for installing the SDRuno software, which usually should be installed prior to connecting the SDR receiver.
Once the SDRuno software is functioning, verify that the RF path is correct by tuning to the same frequency as the TS-590SG and ensure that the same signal is being received at similar signal strengths. Press the PLAY! button inside of the SDRuno MAIN window, and watch the waterfall come alive in the MAIN SP window.

Configurating Frequency Control
Now that basic connectivity is established and you've ensured that RF from the antenna is being pass through to the SDR, it's time to configure the software interfaces.
In my shack, the TS-590SG not only talks to the SDRuno for pan adapter control, but the '590 also talks to the logging software for CAT rig control. This creates a small delima since an RS-232 (or RS-232 over USB in this case) can only be connected to a single piece of software.
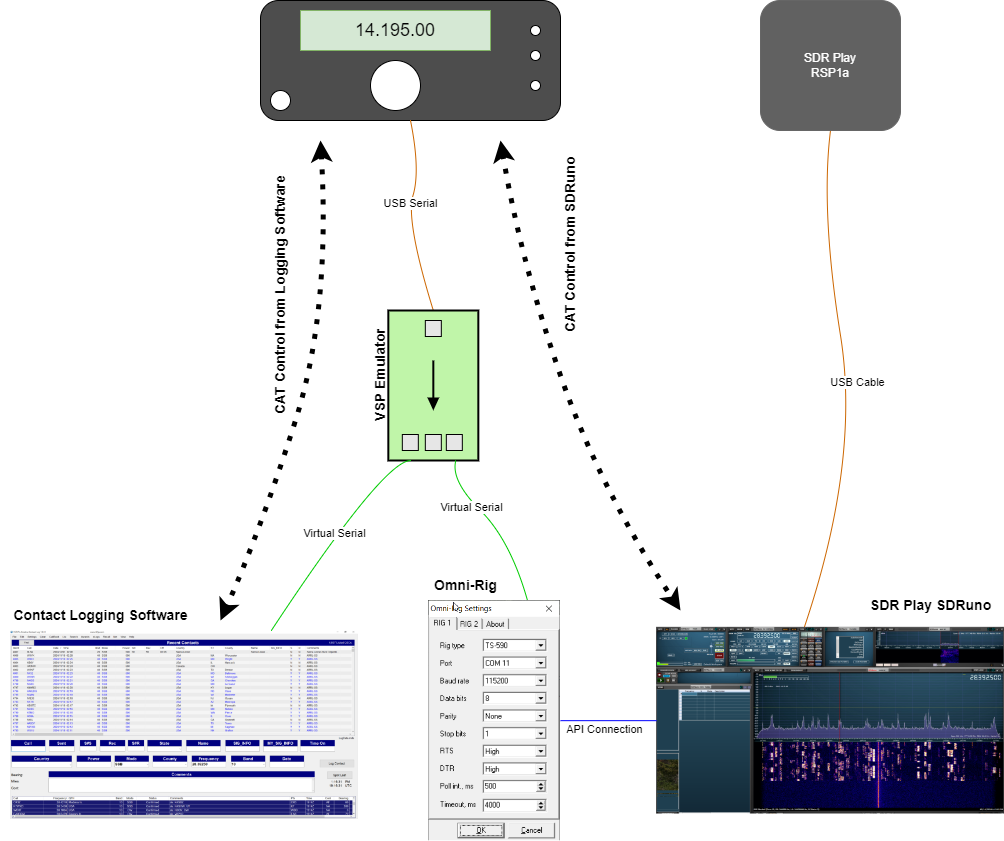
Virtual Serial Port
Now that basic connectivity is established and you've ensured that RF from the antenna is being pass through to the SDR, it's time to configure the software interfaces.
In my shack, the TS-590SG not only talks to the SDRuno for pan adapter control, but the '590 also talks to the logging software for CAT rig control. This creates a small dilemma since an RS-232 (or RS-232 over USB in this case) can only be connected to a single piece of software.

Configurating Omni-Rig
At this time, SDRuno does not support computer CAT control of any ham transcievers natively from SDRuno, but they do support Omni-Rig interfacing.
Omni-Rig was designed to be a universal signalling app to allow multiple pieces of software to communicate with a single radio transiever. The problem/solution which is very similar to the one we just solved with the Virtual Serial Port above. Unfortunately Omni-Rig never really took off, and there's limited support among the software vendors out there.
SDRuno however is on that support Omni-Rig, but it only supports Omni-Rig 1.20. It does NOT support the newer Omni-Rig version 2.
Download Omni-Rig Client 1.20 from DX Atlas website. Unzip the Client.zip file that gets downloaded, and run the Client.exe file to install Omni-Rig.
Omni-Rig is a very basic application. It can control two different radios simultaneously, and we'll just focus on configuring Rig1 as a TS-590SG.
From the Rig Type drop-down, select ths TS-590. The Port should be the Virtual Serial Port that we configured above. In my shack, that's COM11.
The baud rate is 115,200 by default on the Kenwood, and the rest of the options can be left at default. Click the OK button.
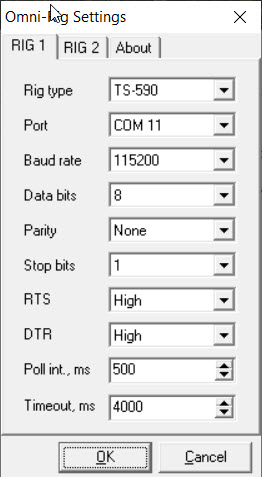
Even though the program disappears, it continues to run in the background and should be ready for the final step.
Configurating SDRUno
With the Virtual Serial Port functioning, and the Omni-Rig interface configured, launch SDR Plays SDRuno.
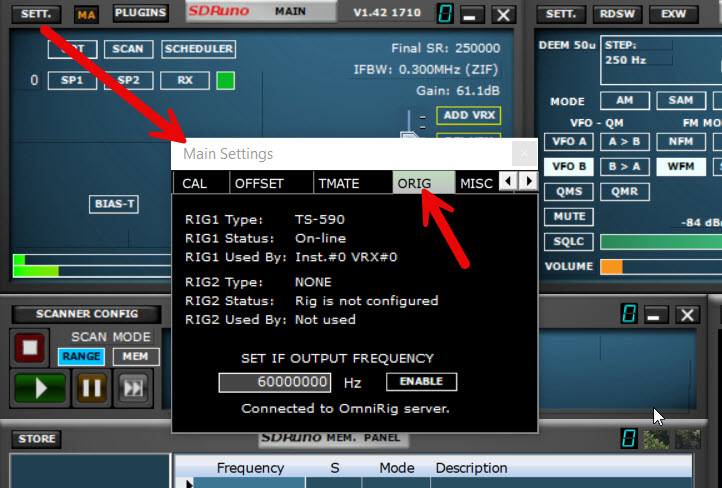
Configure SDRuno to communicate with the TS-590SG by entering the SETT menu from the MAIN control window in SDRuno. The Main Settings window will appear. Click on the ORIG tab and you should see the RIG1 type is a TS-590, and the status is "Connected to OmniRig server."
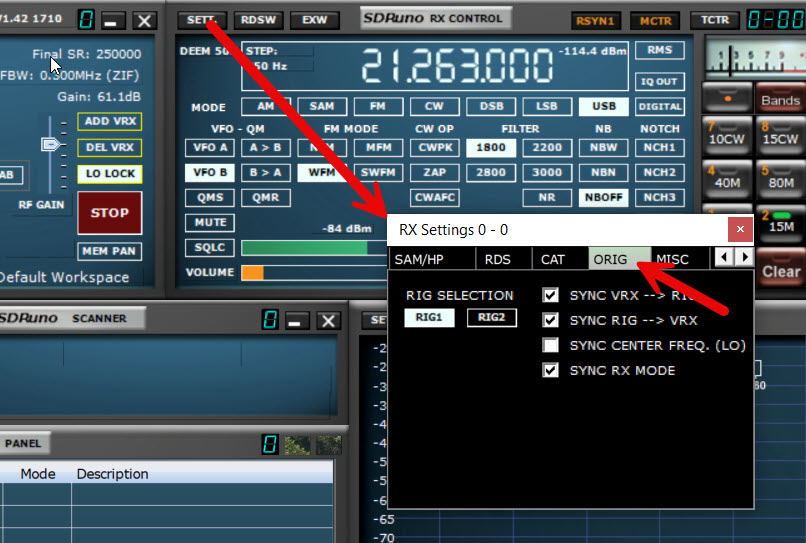
Close out of the Main Settings window, and click the SETT button on the RX CONTROL window. A similar RX Settings window will appear, which also has an ORIG tab in it.
In that ORIG tab, be sure that RIG1 is selected, and boxes 1, 2, and 4 are selected. These boxes are the magic that keep the TS-590SG's frequency in sync with the SDRuno's frequency.
Click the red X to close the RX Settings box and return to the main SDRuno page. Click the PLAY! button in the MAIN window to begin receiving.
You should see the waterfall displaying the spectrum of the RF being received by the SDR play. If you click in the main SP window, the TS-590SG should adjust its frequency accordingly. Conversely, if you move the tuning knob on the Kenwood the band display in SDRuno should change.
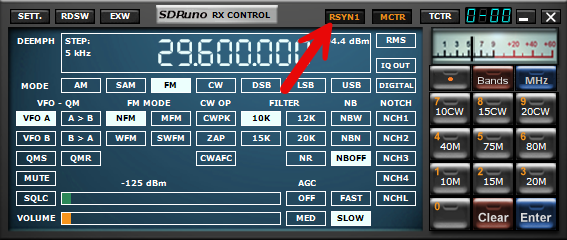
Enable synchronization of frequency by clicking the RSYN1 button in the top of the RX CONTROL window.
Configuring the Band Buttons
Configuring the band edges in the waterfall display can be a tedious process. Fortunately there's a simple way to predefine the bands that you want to operate on HF.
In the RX control window there's a series of buttons on a number pad. Begin by clicking on the Bands button at the top, and select Custom from the menu.
Right-click on of the buttons and it will open a window where you can configure with that button is defined as.
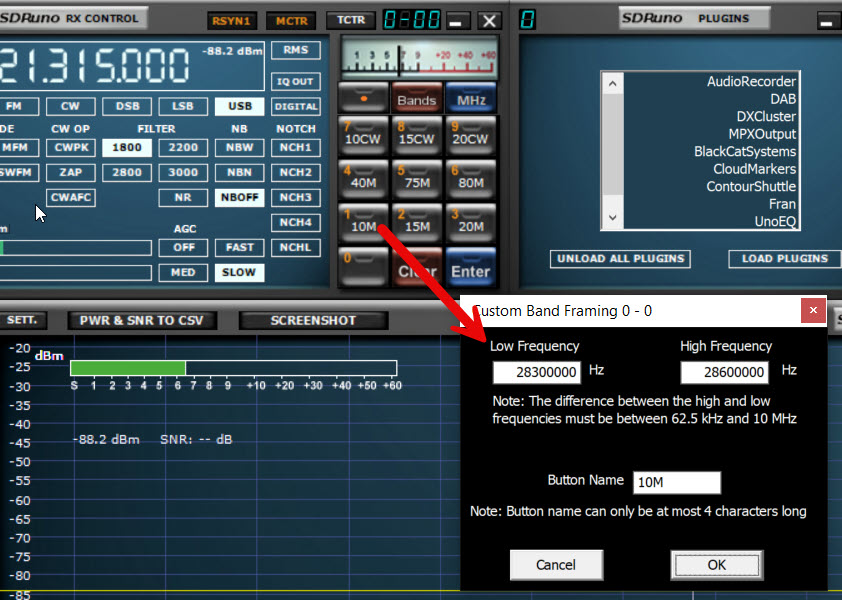
I have my band buttons defined by the individual ham radio band. I normally don't operate throughout the entire 10m band, so I've only defined the normal 28.3 to 28.6MHz band for 10 meters. I also have a separate band configured for the CW portion of the 10m band. By splitting these up I'm able to get more resolution on the screen when I'm operating.
Here are the bands that I have configured. You may choose to adjust these to suit your operating habits.
# | Name | Low Freq (Hz) | High Freq (Hz) |
|---|---|---|---|
1 | 10M | 28,300,000 | 28,600,000 |
2 | 15M | 21,200,000 | 21,450,000 |
3 | 20M | 14,150,000 | 14,350,000 |
4 | 40M | 7,125,000 | 7,300,000 |
5 | 75M | 3,850,000 | 4,000,000 |
6 | 80M | 3,600,000 | 3,850,000 |
7 | 10CW | 28,000,000 | 28,070,000 |
8 | 15CW | 21,000,000 | 21,070,000 |
9 | 20CW | 14,000,000 | 14,100,000 |
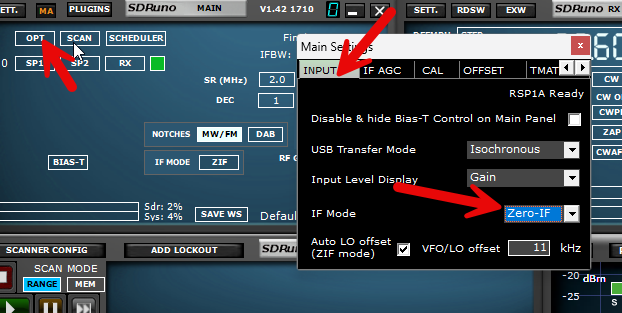
You may need to enable Zero IF in order for the buttons to work. From the MAIN window, click on OPT and then go to the INPUT tab. The IF Mode should be set to Zero -IF, then close that window.
Operating
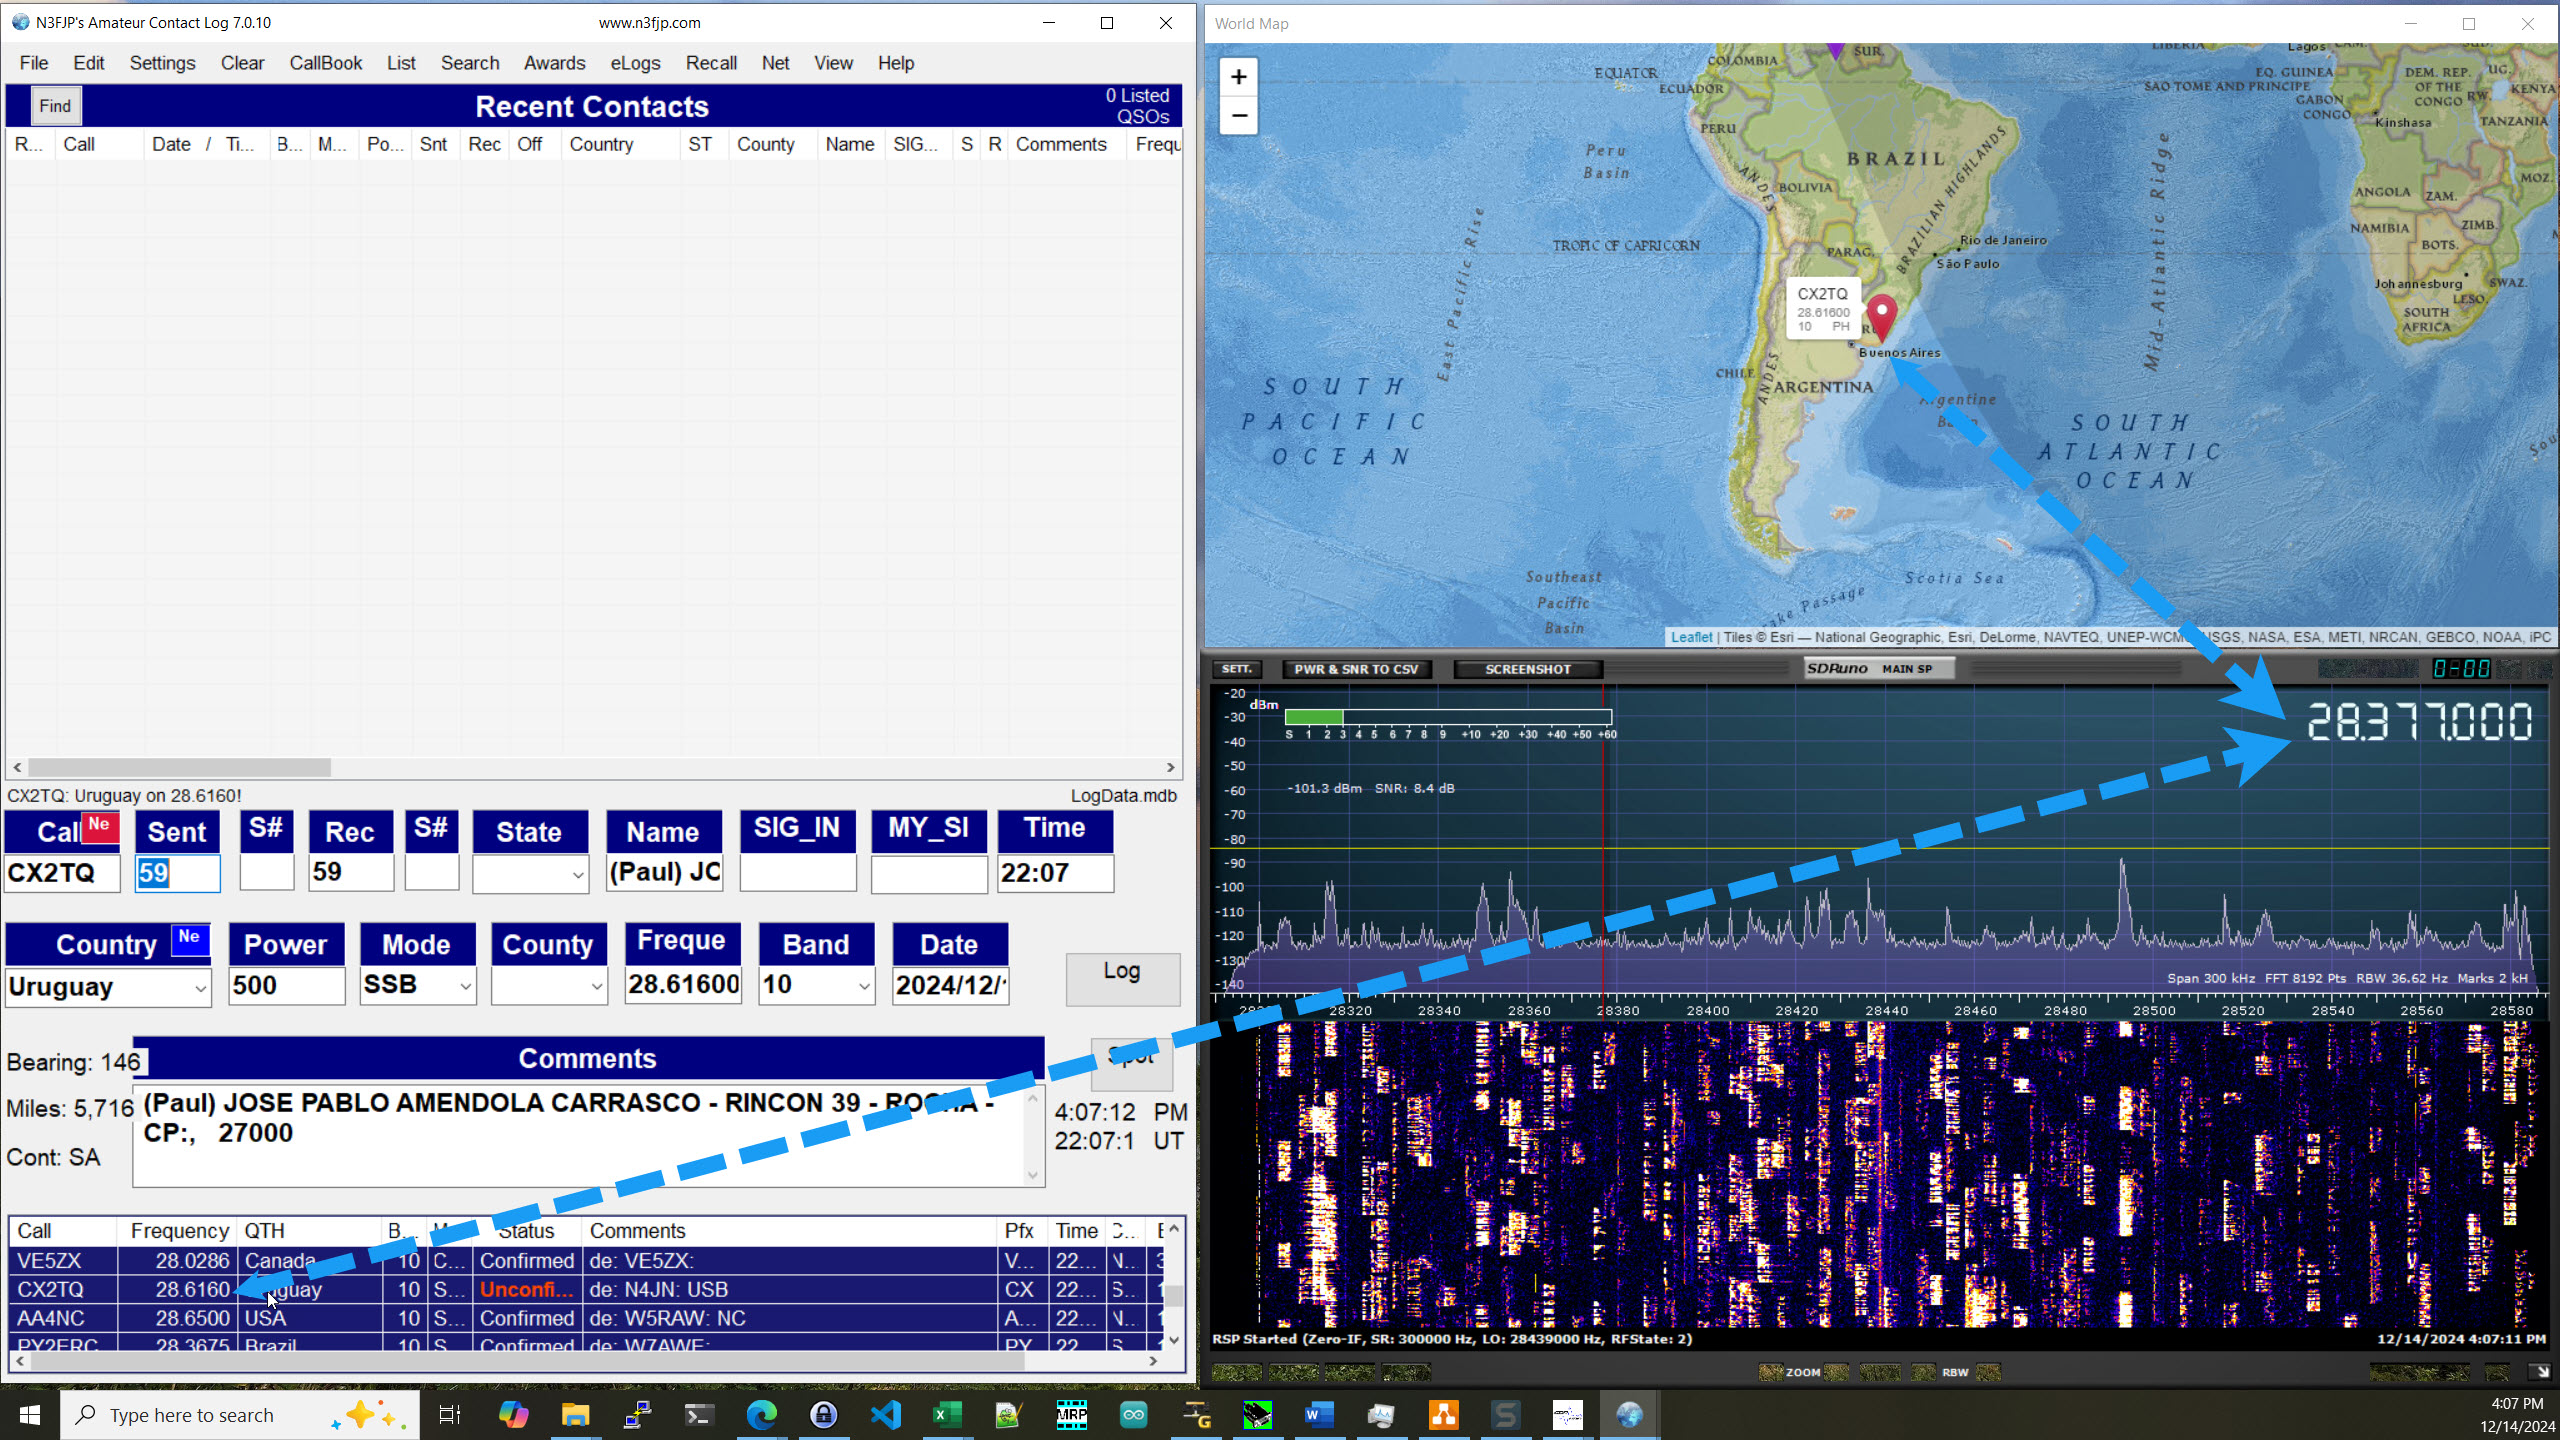
My operating process has evolved to using N3FJP's logging and contest-logging software. His software has DX spotting built into it, so I can click a spotted DX from several spots within his software, including on a World Map window, and it wil tune the TS-590SG to that frequency.
By leveraging the SDRuno pan-adapter, the waterfall spectrum display will also follow along.
And if I'm not chasing spots but instead in just a hunt mode, I can click on any of the signals that are displaying on the waterfall, and the TS-590SG and the N3FJP log will follow along.
Parts List
- Kenwood TS-590SG
- SDRPlay SDR Receiver
- SMA to RCA Coax Cable
Related Articles


