Tower Installation and Budgeting
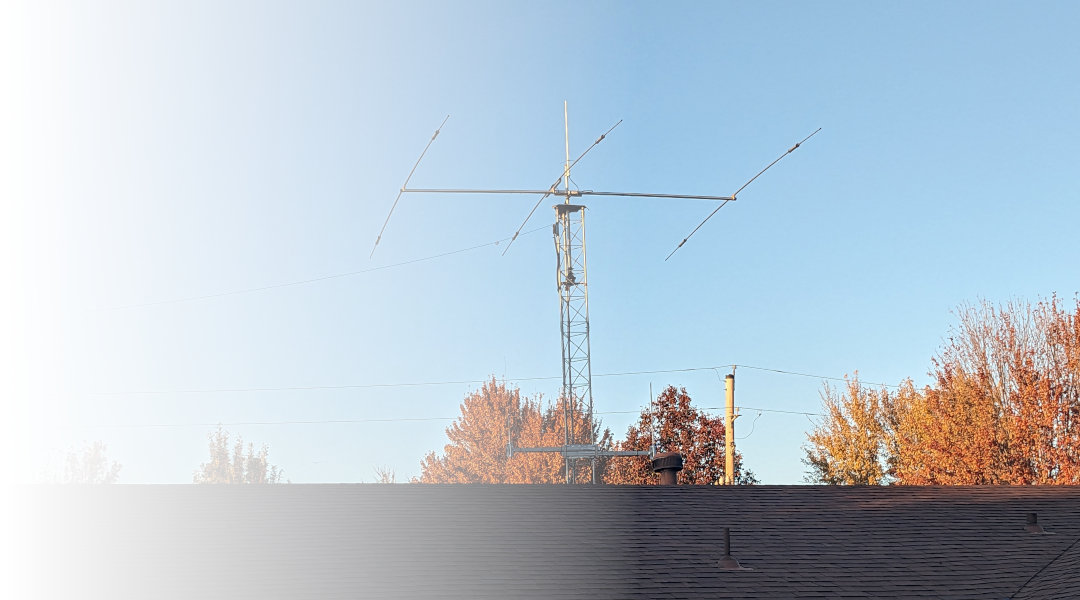
I recently fulfilled my adult ambitions to install a permanent ham radio tower, fully equipped with a rotatable Tri-Band Yagi antenna for chasing DX. Along the way, I learned a lot about planning and installing radio towers.
Determining Your Needs
The first step in planning your tower installation is to decide which antennas and bands you will be using. This will influence the type of tower you need and its specifications. This post isn’t intended to be a review or an endorsement of the equipment that I selected, but instead what I ended up with.
My operating mostly involves the upper HF bands, and basic VHF/UHF communications. I chose the following antennas:
- Mosley Classic CL-33-M Tri-bander
- A pair of Comet GP1 2m/70cm antennas
- Diamond Antenna D3000 Discone antenna for general purpose receive in the VHF/UHF bands.
- MyAntenna EFHW-8010-2k wire for 10-80m
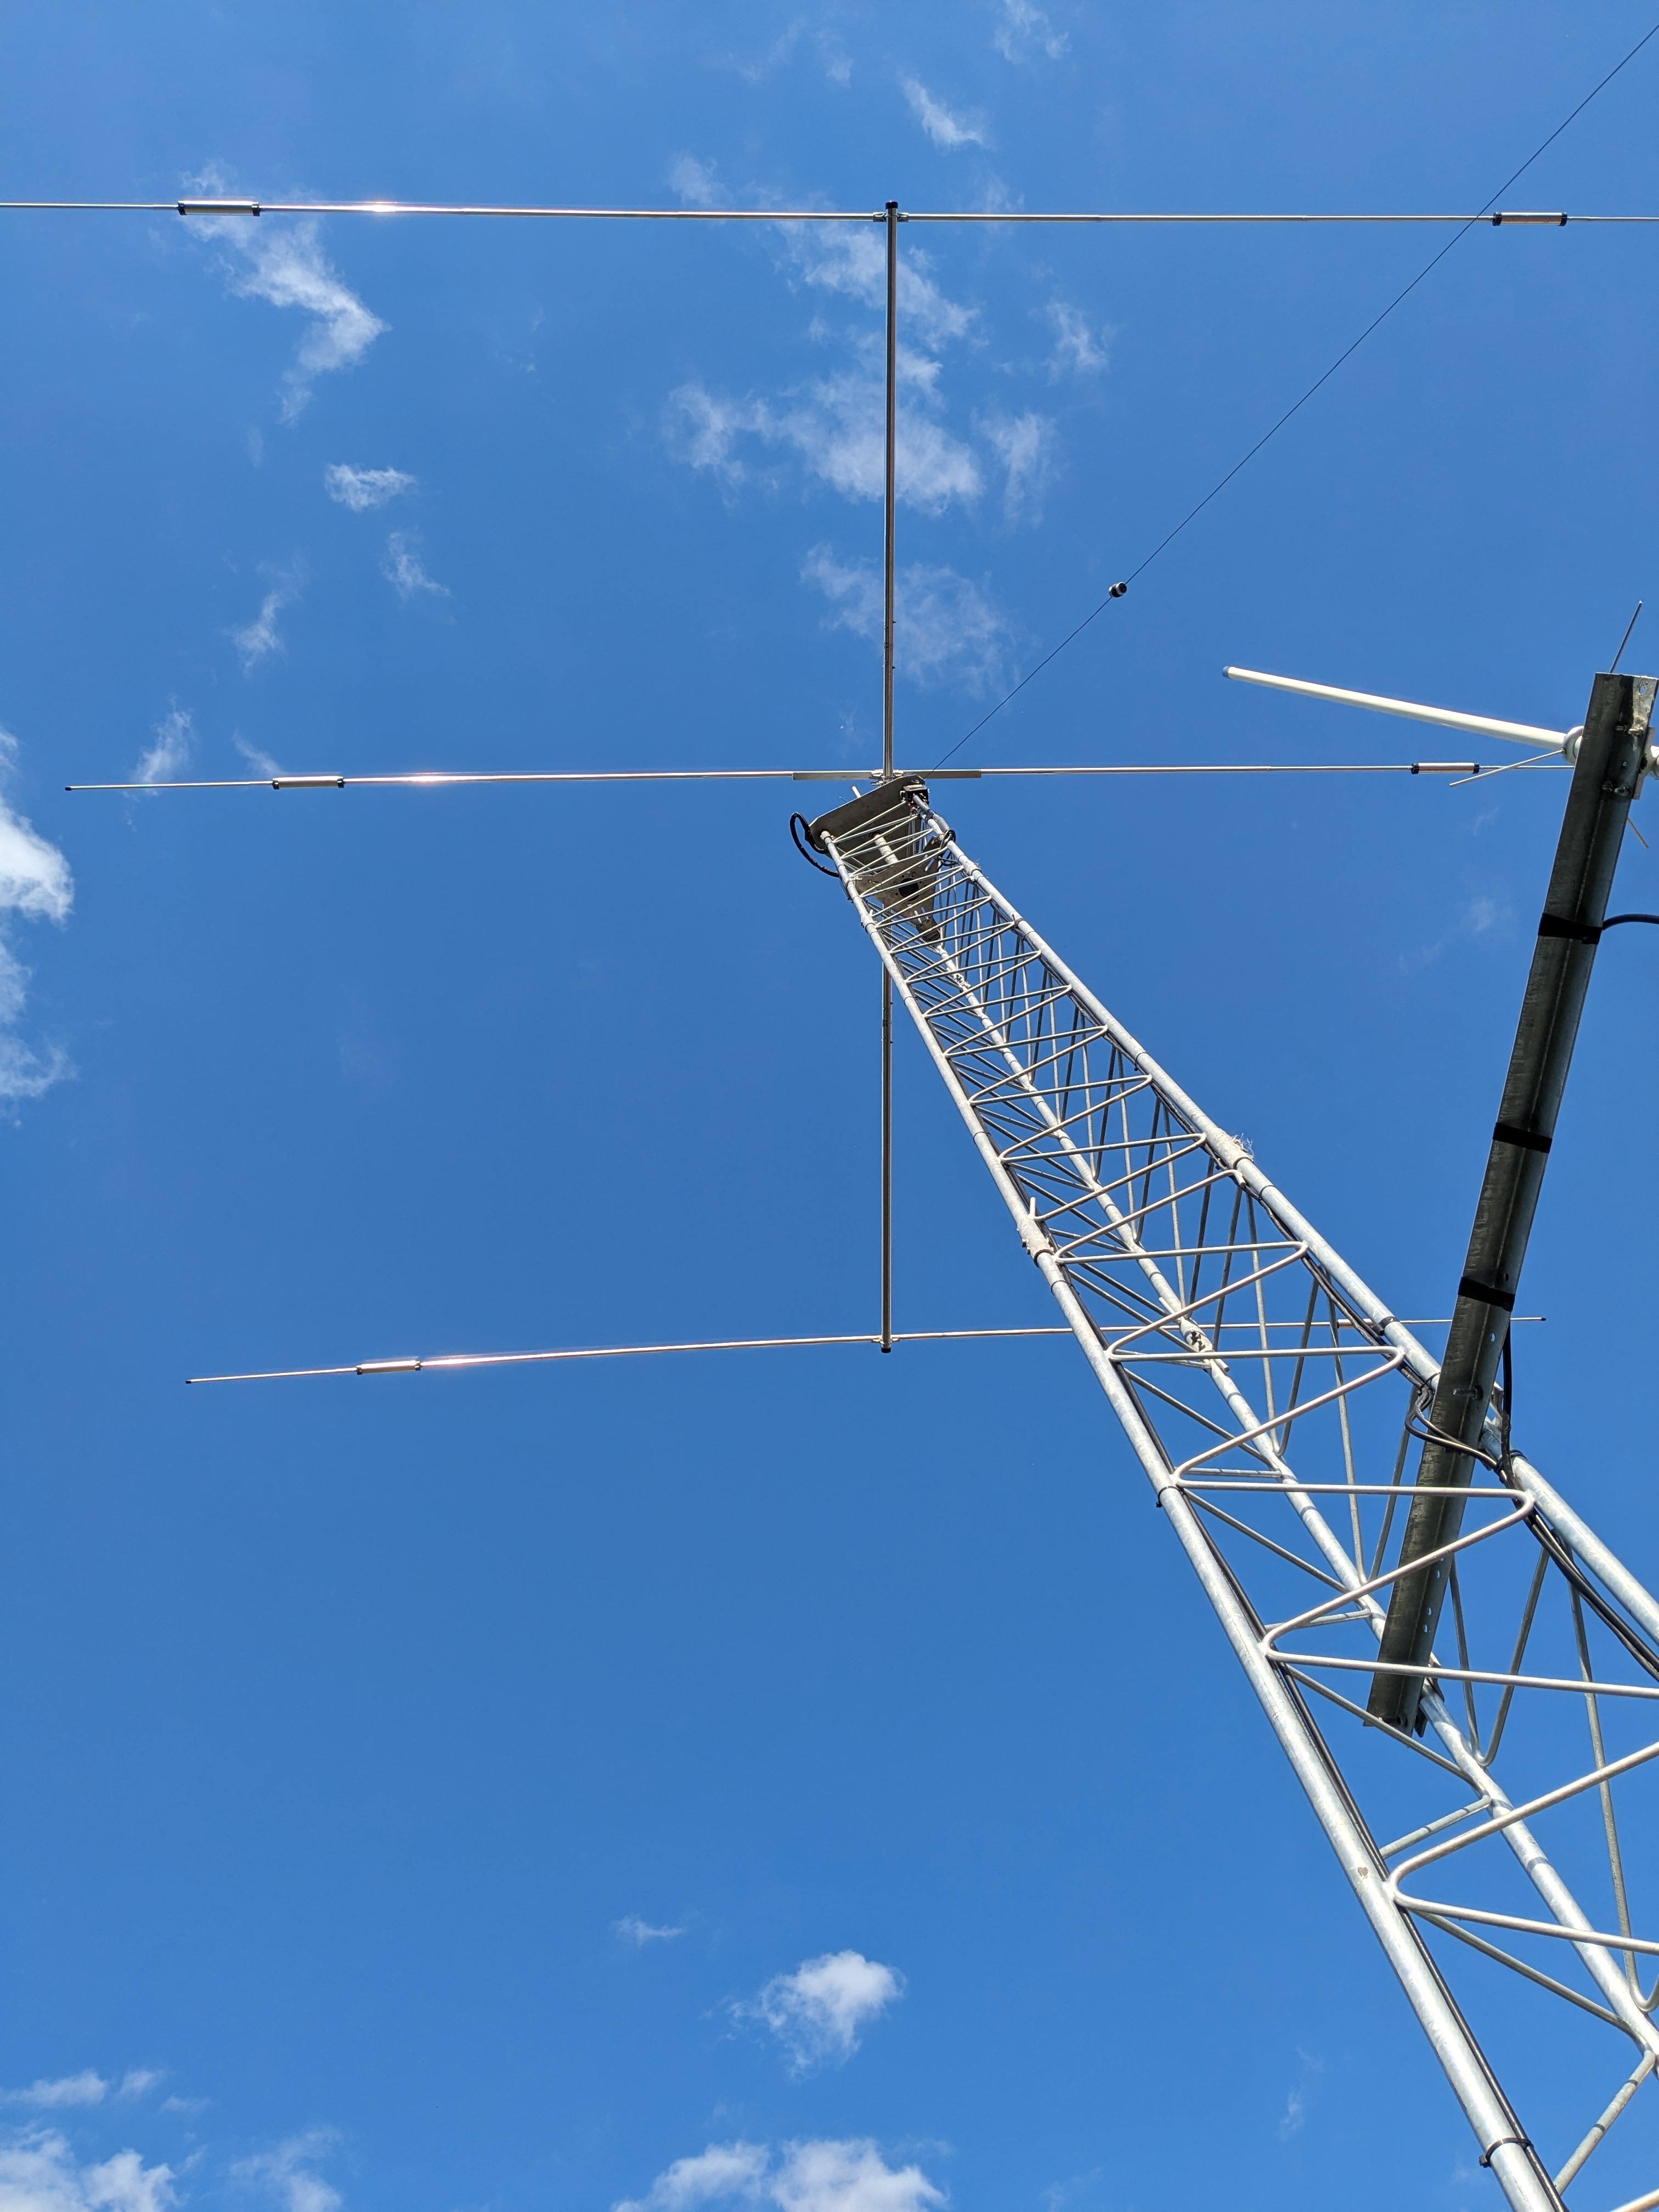
With the antennas identified, the wind loading can be looked up from the manufacturer datasheets. This calculation helps ensure your tower can withstand local wind conditions, preventing potential damage.
My Wind Surface Area came in around 7 square feet, most of which comes from the Mosley Tri-band antenna.
Selecting the Tower
Rohn provides comprehensive documentation that is invaluable when selecting a tower. It includes details on different tower models and their specifications.
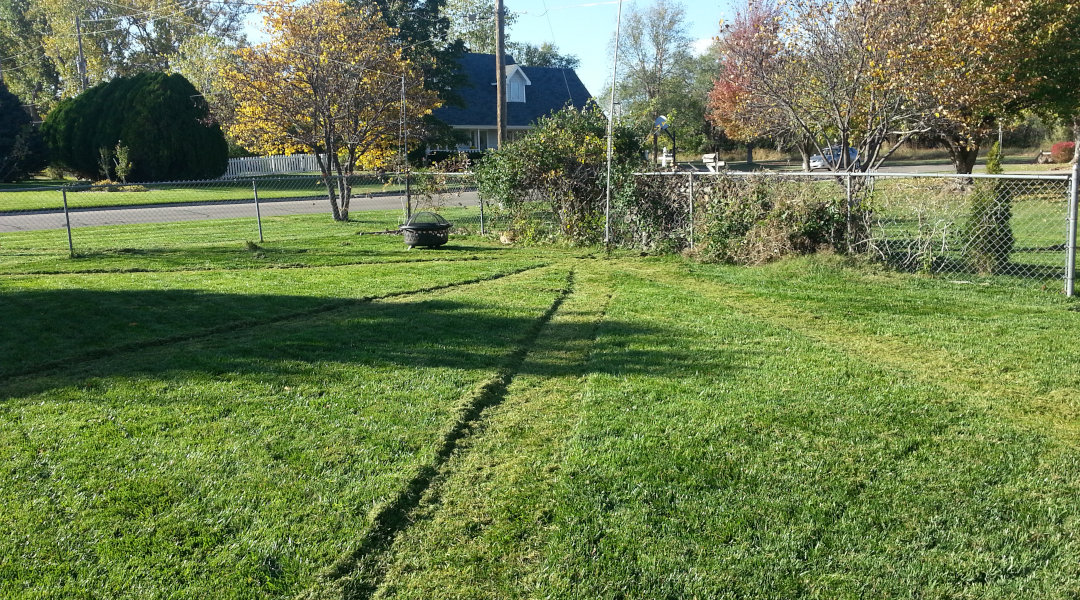
While I would have preferred a tilt-over or even crank-up tower, my yard and the way that the house sits was not conducive to either. I was adamant that I did not want to deal with guy wires, so I settled on the free-standing Rohn 45G tower.
Consulting Rohn’s documentation, there are a series of charts that show the maximum tower height for unguyed (free-standing) towers, based on the maximum wind gust speed. Living in central Kansas, 40-60mph winds are pretty much an annual event, and the maximum wind speed recorded by a nearby airport was around 100mph.
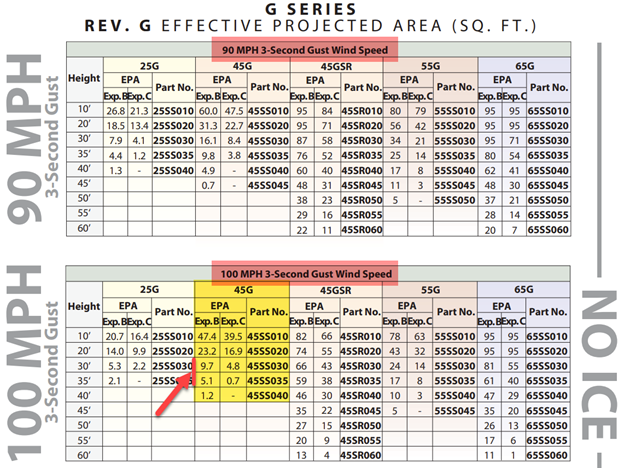
After comparing the 100mph gust chart against about 7 square feet of loading, I found that maximum safe height for my installation would be around 35’.
Planning the Installation
Check for any city ordinances or Home Owner Associations (HOA) limitations. HOAs tend to take a very dim view of antennas and especially towers, so if your property is subject to one you’re likely not going to be able to erect a tower.
City planning on the other hand tends to be fairly forgiving for amateur towers, with certain limitations, such as how tall it may be, or how close it can sit to a property line or easement. My city did not require a permit to put up a tower, however they did ask to inspect the installation prior to pouring the concrete. In my case, they caught the fact that the contractor used a completely inadequate rebar structure and I made the contractor rebuild that to Rohn’s specifications prior to pouring concrete. Other than that one legitimate catch, I didn’t have any issues with the city.
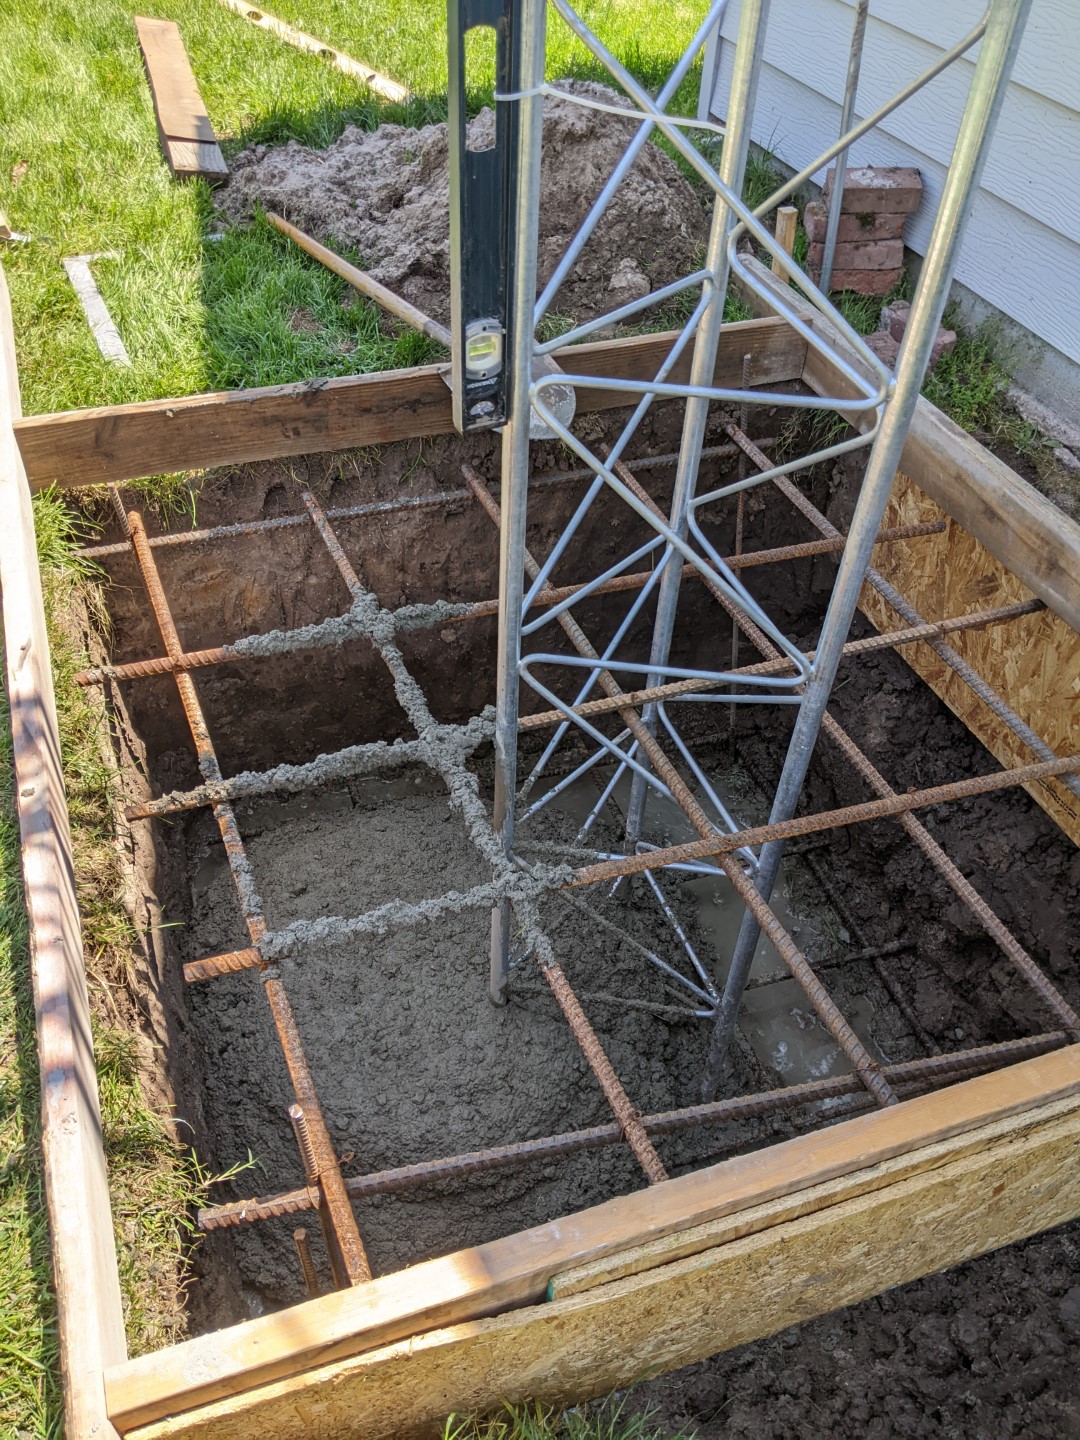
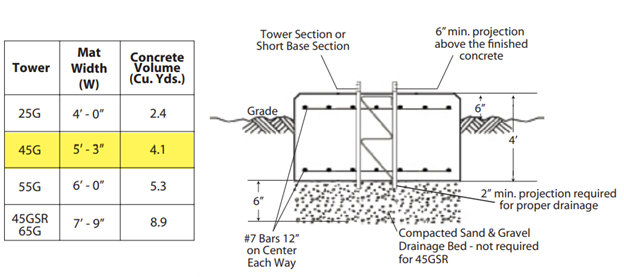
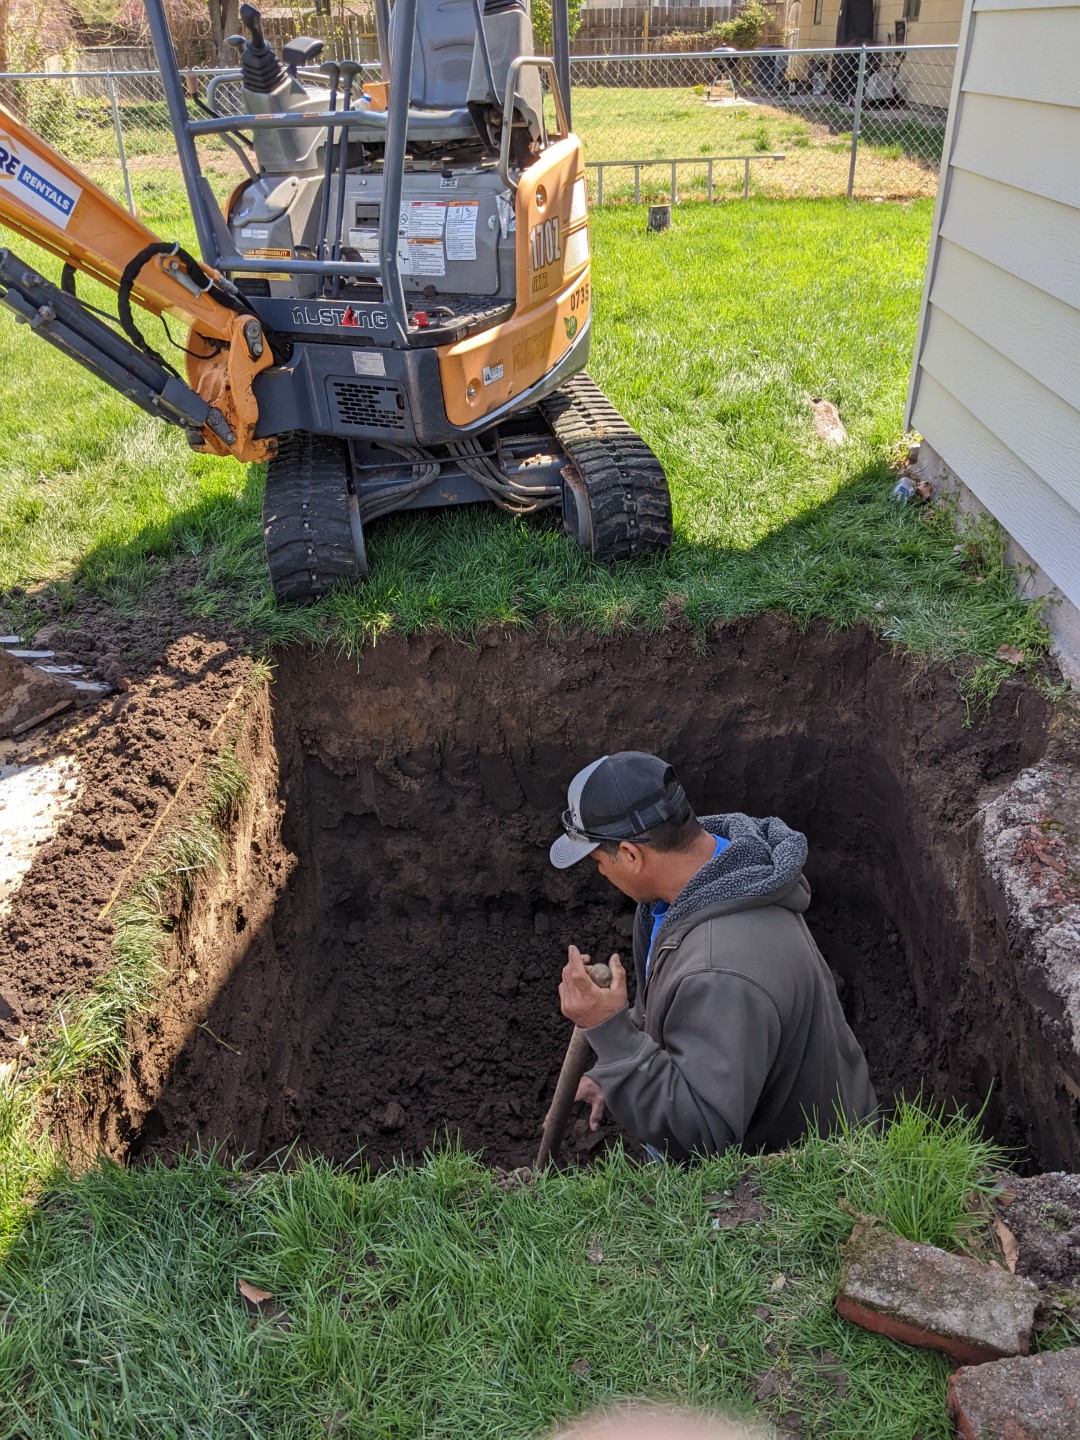
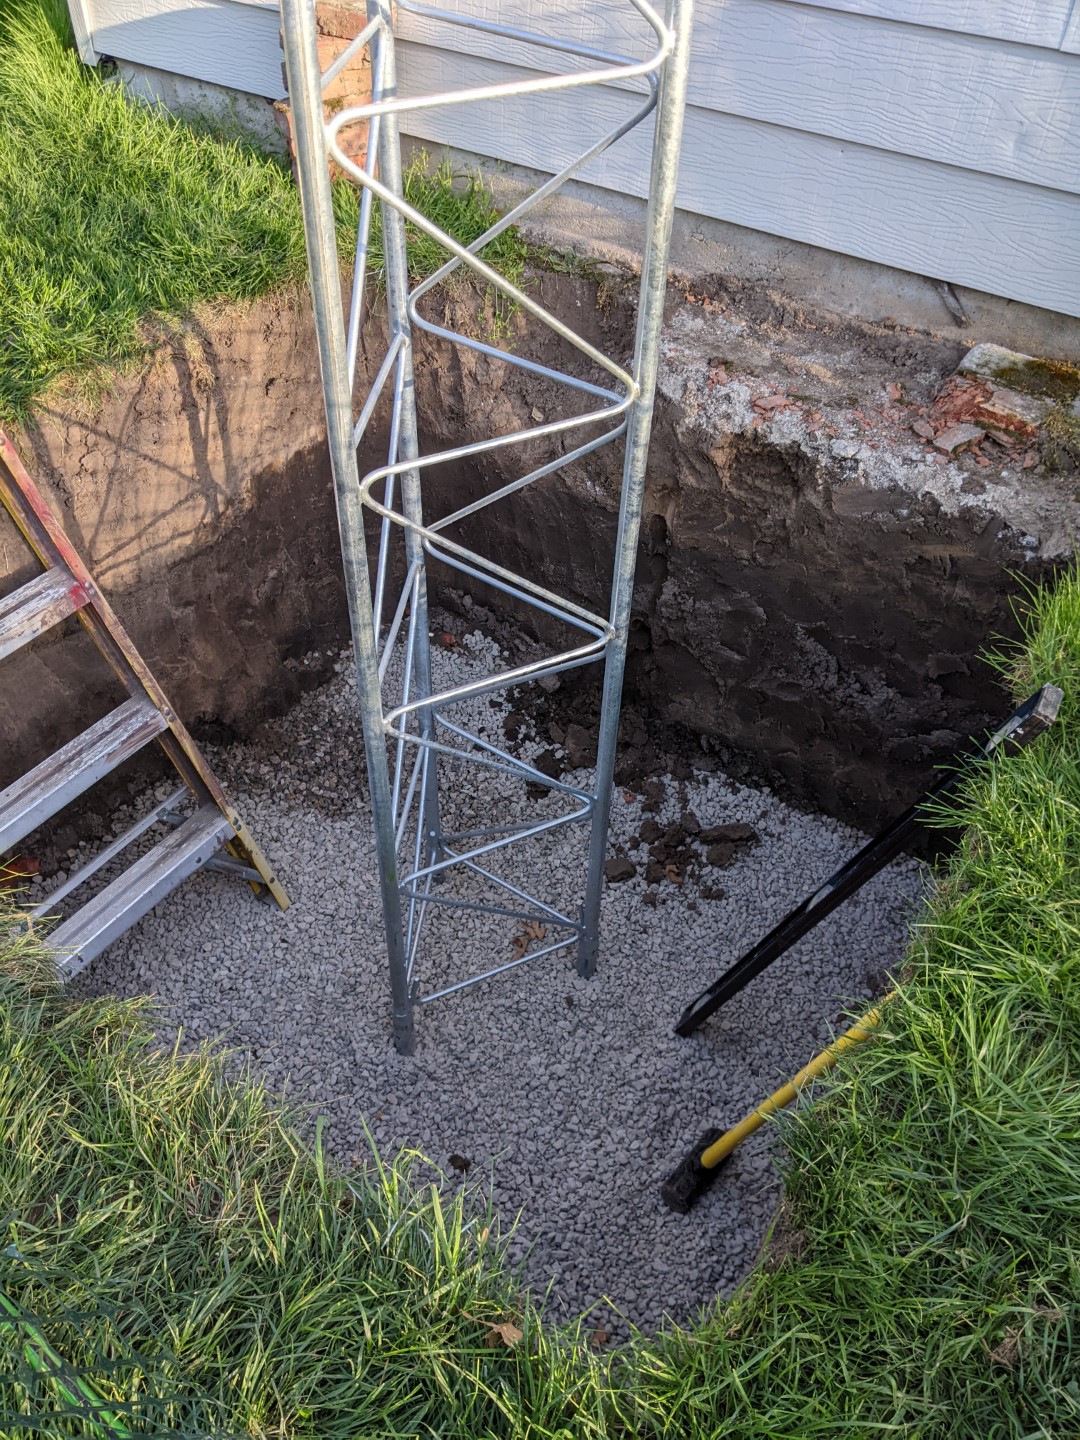
For the tower base, again Rohn’s documentation contains all of the specifications for the tower base. For a free standing Rohn 45G tower, Rohn calls for a 5’ 3” by 5’ 3” base, that extends down 4’. They call our #7 bars of rebar reinforcement, which for the inexperienced like me, equates to 7/8” diameter steel.
After comparing the 100mph gust chart against about 7 square feet of loading, I found that maximum safe height for my installation would be around 35’.
Installing the Tower and Antennas
Setting up a tower is hard work, and is a dangerous activity. Hire someone that has tower-climbing experience to assist with the task, and make sure you have at least a couple of strong backs on the ground to help lift, pull ropes, etc.
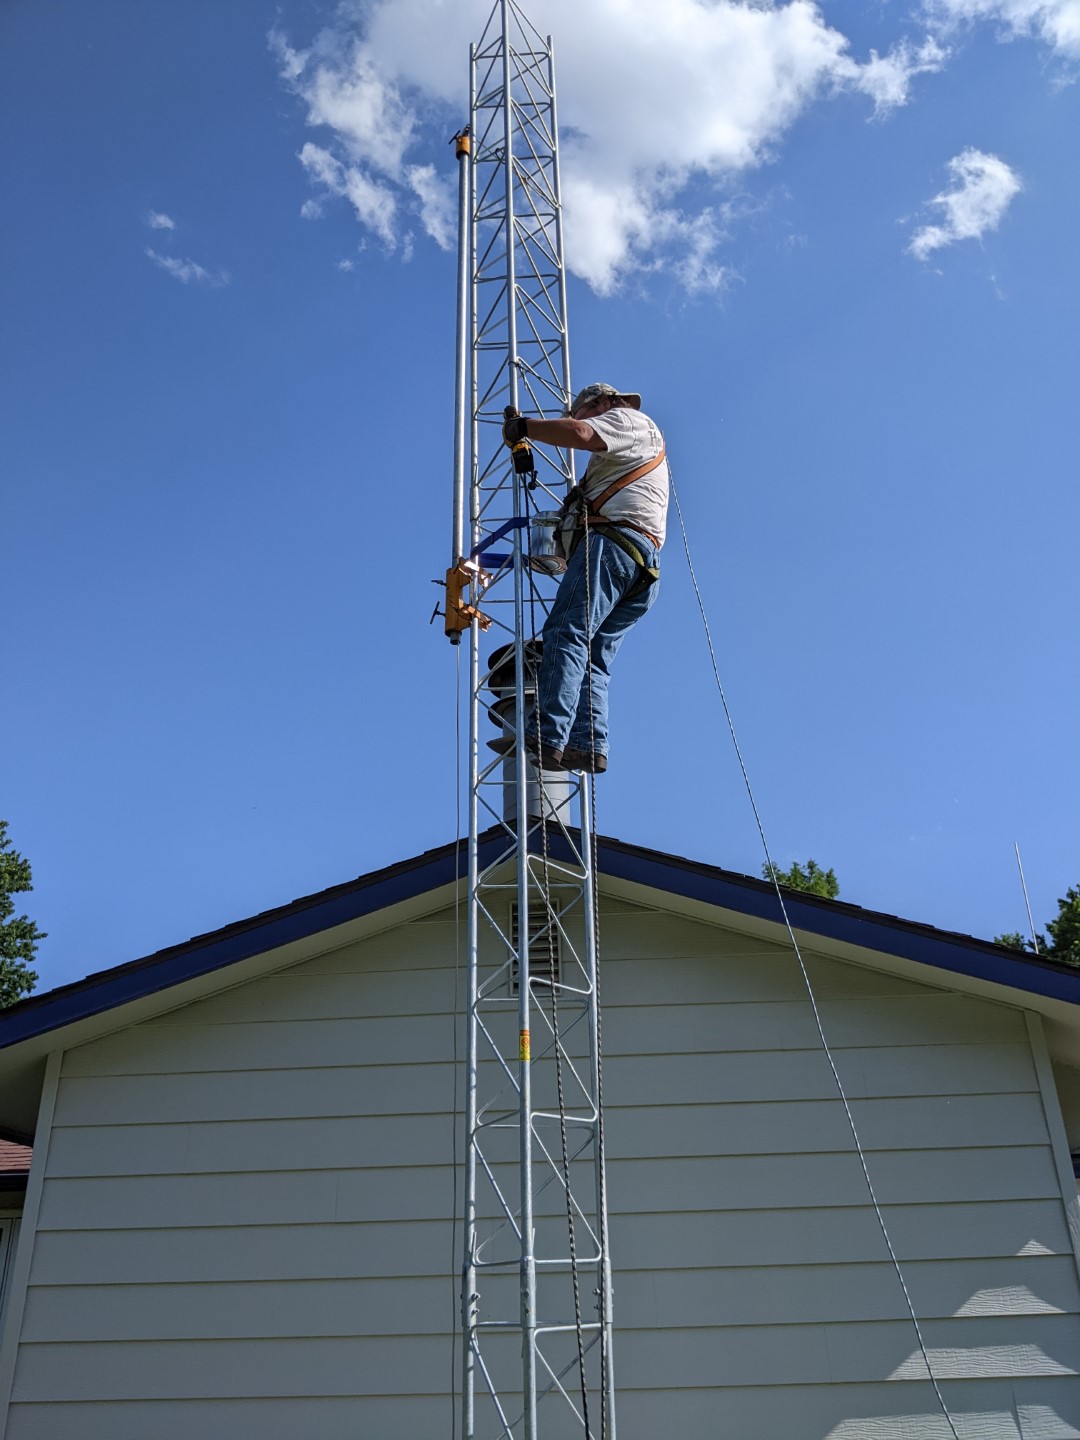
I won’t get into the specifics on how the process is completed, as there are plenty of good resources available both on the web, as well as places such as the ARRL Handbook. The general concept though is to utilize a gin pole, which is a 10’ section of pipe that has a special clamp attached to it that lets you raise it up above the leg on the tower. On the top of the gin pole is a pulley that is used to hoist the tower sections (or eventually the antennas) onto the top of the tower. The idea being that the ground crew does practically all of the heavy lifting, and the tower climber is able to focus on aligning the parts and bolting them together.
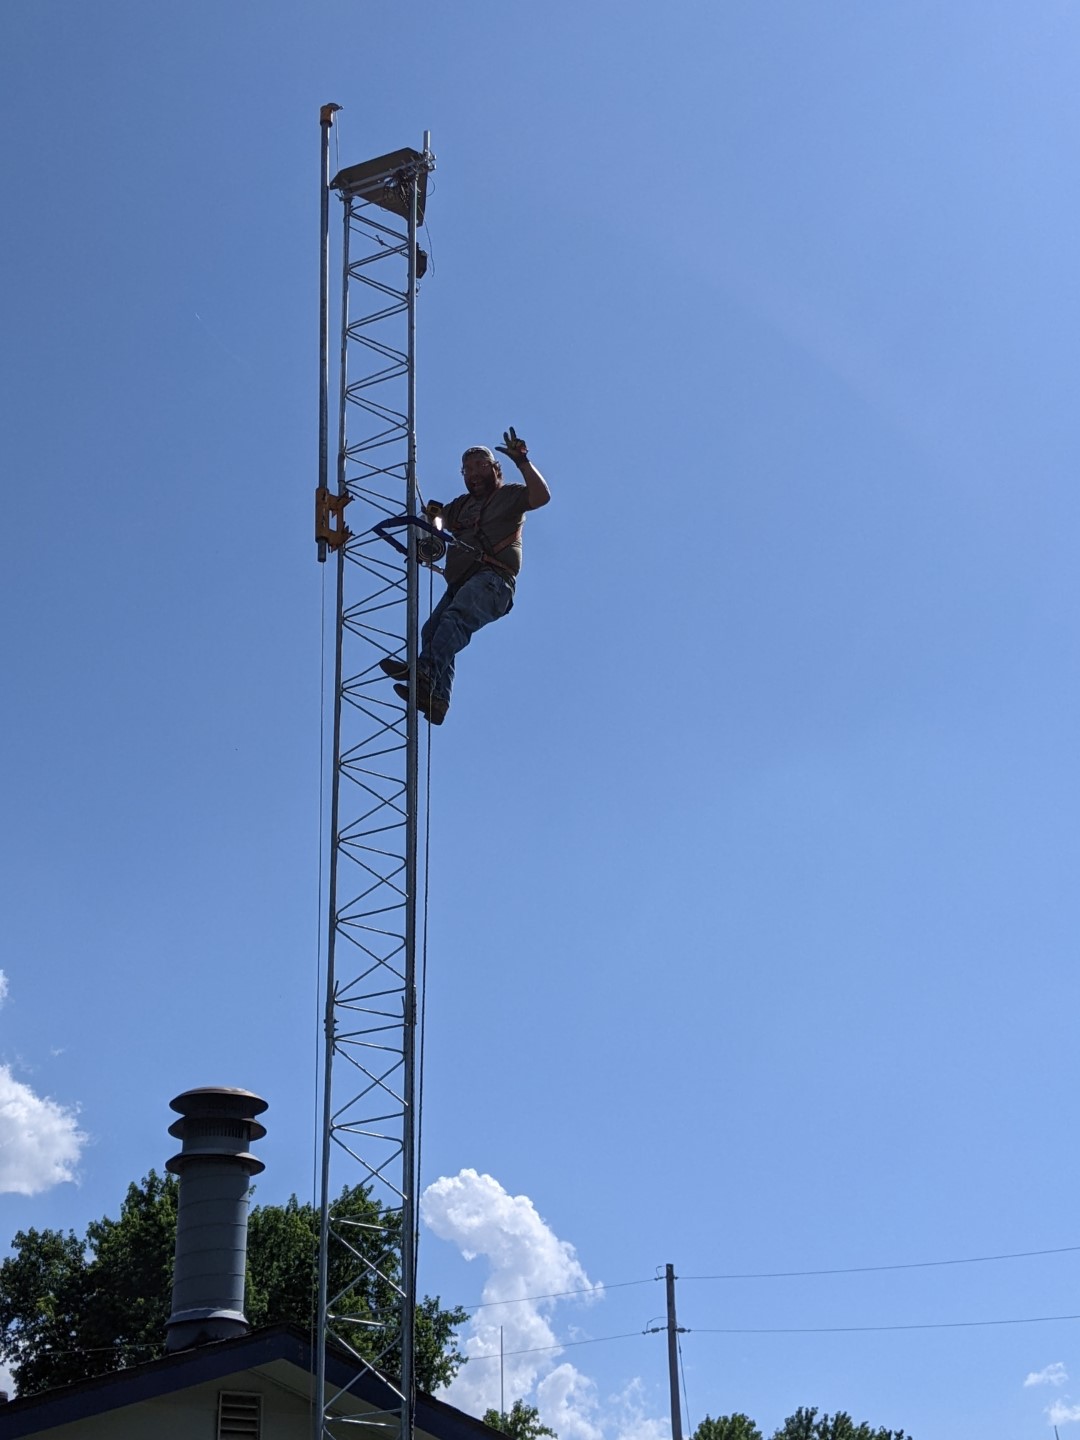
Budgeting for the Tower
When I started this project, I originally underestimated the overall cost. Based on what you initially see for the cost of a section of Rohn 45G tower at a supplier such as DX Engineering, it would appear that you could build a “tower” for around $1,000. As I found, the devil is in the details and all of the random parts will really add up.
I’m going to leave you with a break down of almost every last piece that I used, including an approximate cost. Hopefully as you plan your installation, you can be better prepared than I was.
Description |
Source |
Qty |
Price |
Cost | Notes |
|---|---|---|---|---|---|
Rohn 45G Tower Section |
DX Engineering |
4
| $430 | $1,720 | I buried half of one in the base, and used a flat-top section on top. |
Tower Top Plate |
DX Engineering | 1 | $315 | $315 | A flat-top plate allows you to install a thrust bearing. Thrust bearings take the weight of the antenna off of the rotator, and also allow you to remove the rotator for servicing without removing the beams above the rotator. |
Thrust Bearing |
DX Engineering | 1 | $200 | $200 | The ball bearings that hold the weight of the antenna.
|
Accessory Plate |
DX Engineering | 1 | $130 | $130 | A steel plate that the antenna rotator just below the top of the tower. |
Tower Freight |
DX Engineering | $400 | Trucking freight to deliver the tower sections. | ||
Antenna Mast | Home Depot | 1 | $70 | $70 | Ridged 2" outside diameter conduit. This is the heavy stuff with a threaded end, and NOT the thin-walled piping that is bent to shape. |
Side Mounts | 1 | $150 | $150 | I fabricated an aluminum plate to mount additional VHF/UHF verticals below the top of the tower. | |
Coax RG-213 / LMR400 | 200 | $2 | $400 | Multiple coax runs up the tower for each of the antennas. Not factored in here, but don’t forget the runs into the house. | |
Rotator Cable | 100 | $2 | $200 | Rotator cable from the shack up to the rotator at the top of the tower. | |
PL-259 Connectors | 20 | $5 | $100 | Coax connectors at the antenna, two at the lightning arrestor, and a fourth in the shack. | |
Grounding Wire | Home Depot | 30 | $0.50 | $15 | #6 copper wire to ground the tower legs to the lightning rods. |
Lightning Rods | Home Depot | 3 | $25 | $75 | Three lightning rods, one for each leg of the tower. |
Ground Clamps | Home Depot | $40 | Various sized clamps to connect the grounding rods to the legs of the tower. | ||
Coax Lightning Arrestor |
DX Engineering | 5 | $70 | $350 | Each antenna needs to be protected from lightning strikes before the coax is fed into the house. |
Rotator Lightning Arrestor |
DX Engineering | 1 | $190 | $190 | The rotator cable needs to be protected as well as the coaxes. |
Arrestor Plate | $40 | Aluminum plate to mount all arrestors to. | |||
Approximate Total | $4,395 |
Resources
Parts List
- Rohn 45G Tower
- Mosley Classic CL-33-M
- Comet GP1 Dual-band Antenna
- Diamond Antenna D3000 Discone
- MyAntenna EFHW-8010-2k
- Yaesu 450 Rotator
- Alpha Delta Lightning Arrestor
Many misc tower components, see budget below.
Related Articles


